TM 9-6115-664-13&P
4-12.
COVER ASSEMBLY MAINTENANCE
4. Inspect rubber gasket (40) for cuts, permanent set,
deterioration, or other damage. Check security of
attachment.
D. REPAIR.
1. Repair painted and stenciled surfaces in accordance
with Para. 4-11.
2. Remove and replace damaged gasket (40) as
required. Cut bulk gasket to length and secure
using silicon adhesive.
3. Repair of parts, other than painting, is limited to
removal and replacement of damaged components.
E. ASSEMBLY.
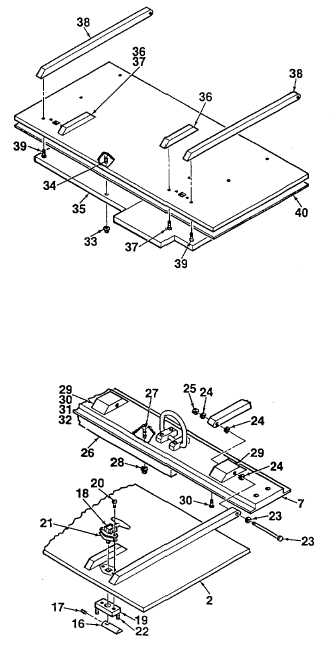
1. Apply loctite adhesive to the threads of screws (37,
39, Figure 4-2). Install hinge bars (38) onto covers
using three screws (39). Install protector blocks (36)
using two screws (37).
2. Apply VHB tape to flanges of diagram tray and
install onto front cover.
3. Spray contact adhesive onto back of insulation (35,
typical). Secure material to underside of covers by
pressing new caps (33) onto studs (34).
4. Install hinge blocks (29) to cross member (7) using
screws (30), lockwashers (31), and washers (32).
5. Spray contact adhesive onto back of insulation (26).
Secure insulation to cross member by pressing new
caps (28) onto studs (27).
6. Attach assembled covers to cross member (7) using
two screws (23), eight washers (24), and two nuts
(25).
Figure 4-2. Cover Assembly
(Sheet 3 of 4)
4-40


